IRC
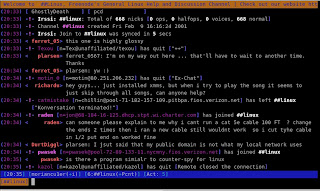
First irssi as an irc client. This is what irssi was originally designed to be. irssi is a console application that can run in screen. You can install irssi by:
sudo aptitude irssi
If you are unfamiliar with irc, then here is a quick explanation and how to.
irc stands for instant relay chat. It essentially gives you access to a chat room. I connect to a few linux irc groups on a regular basis to interact with fellow Linux-ites and to ask questions. Just type irssi at the command line. Once started, You will need to connect to a server. Freenode has tons of interesting irc groups. You can see a list of Freenode irc groups here. to connect to Freenode type the following in irssi:
/connect irc.freenode.net
to join the general linux group, type:
/j #linux
You use esc+# (could also be alt+#) key to move through the irssi 'screens'. (i.e. esc+1 for screen one, esc+2 for screen two, etc)

IM
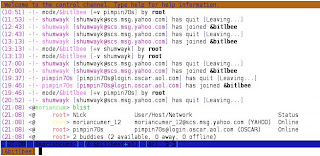
Now let's set up Your instant messenger in irssi with bitlbee.
Install bitlbee:
sudo aptitude install bitlbee
In irssi, connect to a bitlbee server. There are several servers available, I use the following:
/connect im.bitlbee.org
If this is your first time connecting to bitlbee you will need to register. You may need to move to the newly created bitlbee screen in irssi for the following.
register password
This should be a newly create password, used specifically for logging onto the bitlbee server. To set up your IM accounts.
Use the following as model to add your various accounts:
Yahoo
account add yahoo handle password
AIM
account add oscar MyScreenName MyPassword login.oscar.aol.com
Jabber
account add jabber example@server.com password server.address:port:ssl(?)
MSN
account add msn handle passwordOnce you have added your accounts, activate your accounts:
accounts on
Save your settings:
/save
To see your buddies type:
blist
To chat, type your buddies name and message,
name: Hello world!
The next time you log on to bitlbee, identify yourself with your new bitlbee password:
identify [password]

Finally, Let's get twitter going.
Download the twitter perl script from here and save it to your ~/.irssi/scripts directory as wd.pl. Then install a few dependencies.
sudo aptitude install libjson-perl libdatetime-format-strptime-perl libwww-perl
Next you will need to create the following file ~/.netrc by typing,
nano ~/.netrc
copy and paste the following in the file and save.
# set your username (e-mail address) and password in your ~/.netrc file.Change $username to your twitter username and $password to your twitter password and save the file. You can find this information in the wd.pl file you downloaded earlier. Once the file is saved, change the permissions of the file.
# eg.
# % echo "machine twitter.com login your@email.address password
# yourpass" > ~/.netrc
# % chmod 0600 ~/.netrc
#
my $username;
my $password;
chmod 600 ~/.netrc
In irssi create an alias,
/alias twit /exec ~/.irssi/scripts/wd.pl $*
and save./save
Now twitter away by using the following.
/twitwill update all your friends twits and to post a twit, use the following:
/twit -sv "hello World"

OOOOHHH YEAH! the perfect irssi set up. Now doesn't that feel good.
Learn more about twitter here.
NOTE:  THE wd.pl SCRIPT NO LONGER WORKS DUE TO A CHANGES
WITH TWITTER. I CURRENTLY DON'T HAVE A FIX FOR THE SCRIPT.
I HAVE BEEN IN CONTACT WITH THE DEVELOPER, BUT SEEMS TO
HAVE LOST INTEREST IN THE PROJECT.


3 comments:
I tried this, but it doesn't work! I keep getting this error:
aaron@cruise:~$ ./wd test
Can't get Twitter status: 404 Not Found at ./wd line 108.
My .netrc file is setup properly.
Try http://code.google.com/p/tircd/ as a replacement for wd, it works fairly well.
I will second tircd. It's great! Just install the required CPAN modules, and it works like a charm!
Post a Comment